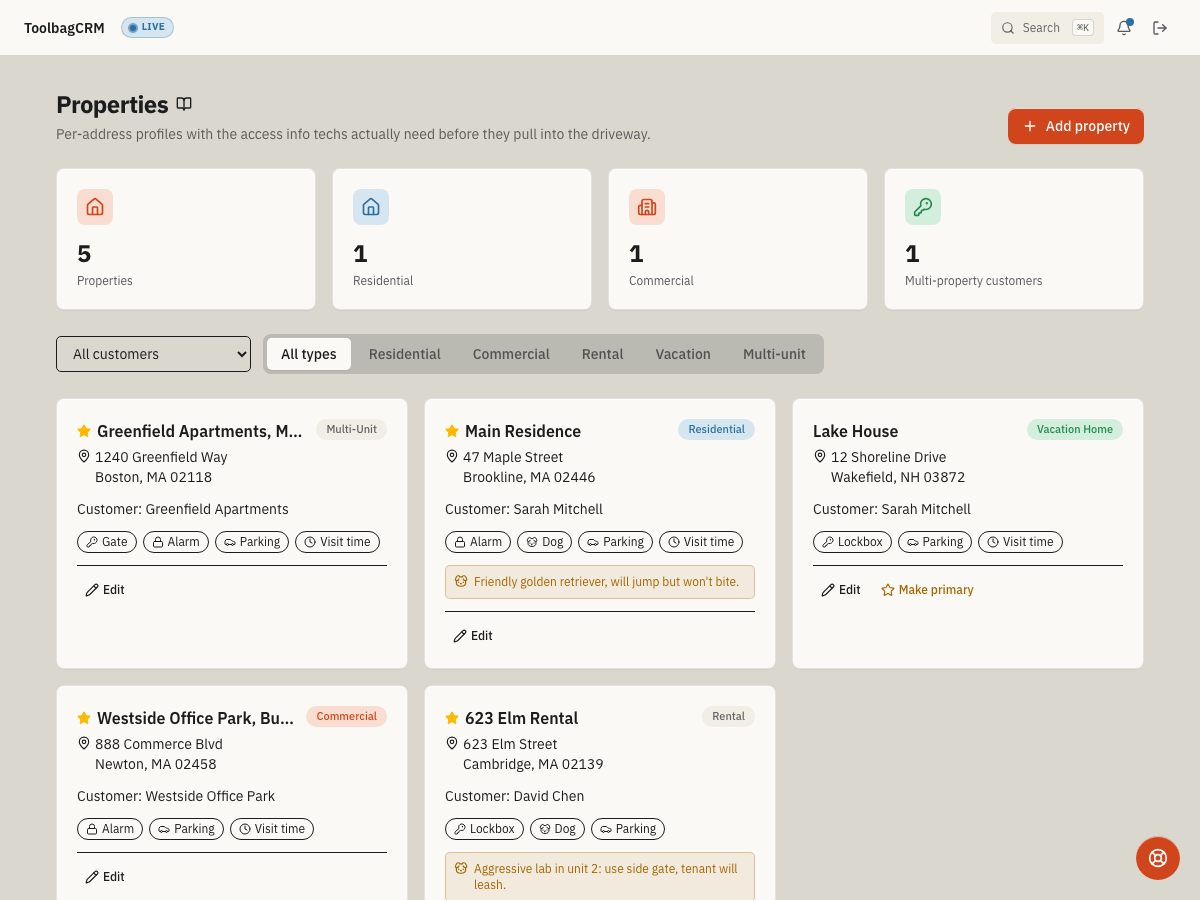
Properties
Properties gives each customer one or more service-address profiles, including the access details technicians need before they arrive: gate codes, alarm codes, lockbox combinations, dog warnings, parking notes, best visit time, and other site notes.
When to use this
Use Properties when:
- One customer has multiple service locations, rentals, vacation homes, or commercial sites.
- Technicians need address-specific instructions before they pull into the driveway.
- Your office needs to mark the primary property for a customer while keeping secondary sites available.
- Dispatchers want to filter service locations by customer or property type.
Before you start
- Confirm Properties is included in your ToolbagCRM plan.
- Make sure Customers is available, because every property belongs to a customer.
- Ask an administrator to enable Properties from Settings → Features if the page says the plugin is disabled.
- Decide which access notes your team is comfortable storing in ToolbagCRM and who should be allowed to edit them.
What you can manage
| Area | What it does |
|---|---|
| Property profiles | Store the property name, customer, type, street address, city, state, and ZIP. |
| Access details | Capture gate, alarm, lockbox, dog/pet, parking, best-visit-time, and other access notes. |
| Property types | Filter or label sites as Residential, Commercial, Rental, Vacation, or Multi-unit. |
| Primary property | Mark the main address for a customer, then move the primary star to another property when needed. |
| Dashboard counts | Review total properties, residential properties, commercial properties, and customers with multiple properties. |
Add a property
- Open Properties.
- Select Add property.
- Choose the customer.
- Pick the property type.
- Enter a clear Property name, such as
Main residence,Lake house, or623 Elm rental. - Add the street address and any city/state/ZIP details your team needs.
- Fill in the access section only with details technicians should see in the field.
- If this is the customer's main site, select Set as primary property for this customer.
- Select Add.
Edit or delete a property
- Open Properties.
- Use the All customers dropdown or type tabs to narrow the list if needed.
- Select the property card or choose Edit.
- Update the address, access notes, parking notes, best visit time, or general notes.
- Select Save.
To remove a property, open it in edit mode and choose Delete. Use this carefully: deleting removes the profile and its stored access details.
Mark the primary property
When a customer has more than one property, the primary property shows a star. To move the star:
- Find the secondary property card.
- Select Make primary.
- Confirm the star moves to that property.
Tips
- Keep property names practical. Field teams usually recognize
Main residence,Lake house, orNorth warehousefaster than formal legal names. - Store only access information your team has a real operational need to see.
- Update dog, parking, and best-visit-time notes after customer calls so technicians do not rely on stale instructions.
- Use property type filters during dispatch review to separate residential, commercial, rental, vacation, and multi-unit work.
Troubleshooting
I cannot add a property
Make sure the customer already exists and that required fields are filled in: Customer, Type, Property name, and Street address.
A property does not appear in the list
Clear the customer dropdown and switch the type filter back to All types. The property may be hidden by the current filters.