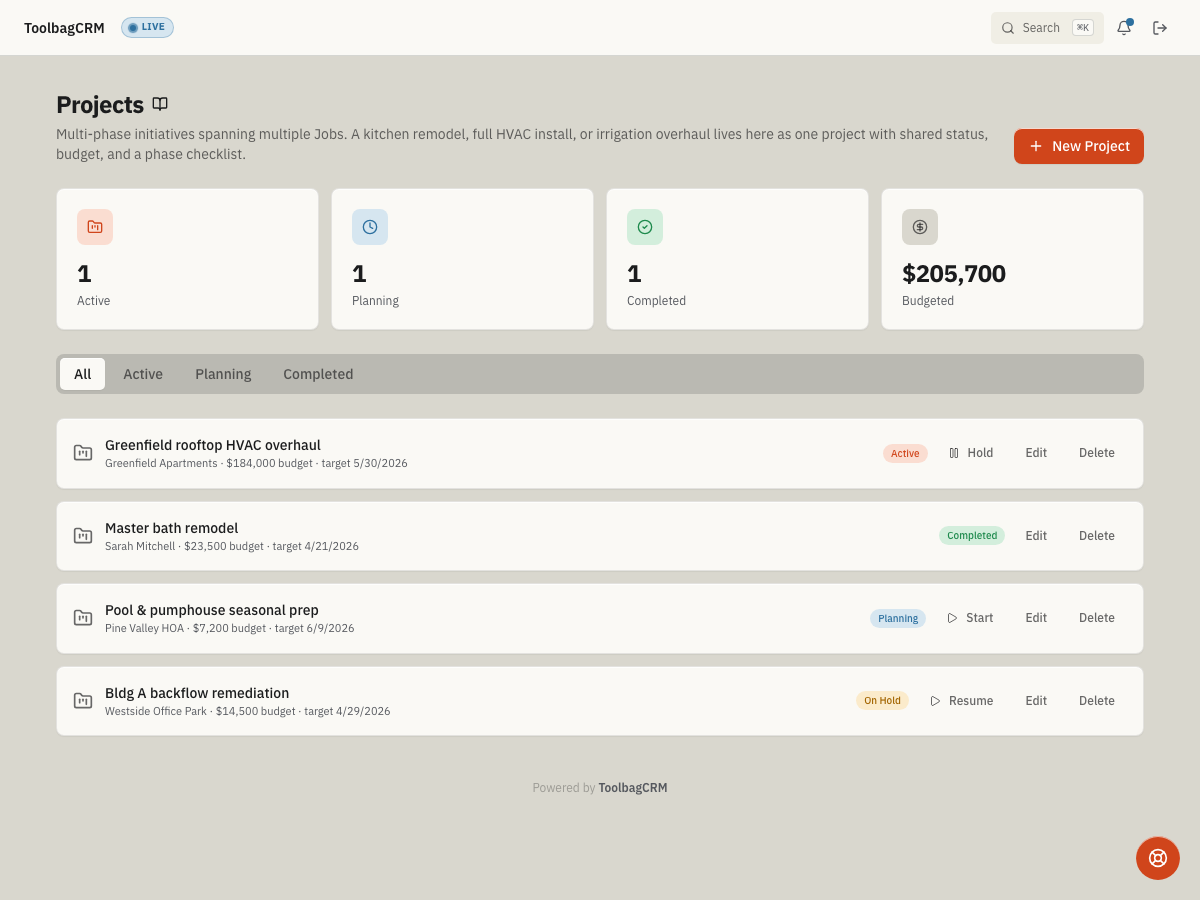
Projects
Use Projects to keep a large customer initiative organized when the work spans multiple jobs, phases, visits, or handoffs. A kitchen remodel, full HVAC install, irrigation overhaul, or multi-day service contract rollout can live as one project with a shared customer, status, budget, dates, and phase checklist.
When to use this
Use Projects when you need to coordinate work that is bigger than one job record, such as:
- Multi-phase installs, remodels, or commercial service rollouts.
- Work that needs one overall budget and timeline but separate phase tasks.
- Office-to-field handoffs where managers need to see Planning, Active, On hold, and Completed work in one place.
- Projects where each phase may eventually line up with a specific job, inspection, or punch-list item.
For one-off visits or a single service call, use the normal Jobs workflow instead. Projects are for the umbrella view above the individual jobs.
Before you start
- Confirm Projects is included in your plan and enabled from Settings → Features.
- Make sure the customer record already exists. Each project must be attached to a customer.
- Decide the first few phases before creating the project so the office and field teams share the same checklist.
- If the route shows Projects is disabled, use Open Settings to enable the plugin or ask an administrator to do it.
What you can track
| Area | What it does |
|---|---|
| Project summary | Stores the customer, project name, description, start date, target end date, budget, and notes. |
| Status | Moves the project through Planning, Active, On hold, Completed, or Cancelled. |
| Phase checklist | Adds ordered phases such as demo, rough-in, final inspection, and punch list. |
| Budget view | Shows the total budgeted amount across active and planning projects. |
| Completion | Completing every phase automatically flips the parent project to Completed unless the project was cancelled. |
Create a project
- Open Projects.
- Click New Project.
- Choose the Customer.
- Enter the Project Name and optional Description.
- Add Start Date, Target End, and Budget ($) if you want the project dashboard to track them.
- Click Create Project.
New projects start in Planning by default. Use Start from the project row when the team is ready to move the project into active work.
Manage status and details
- Use the tabs at the top of the page to switch between All, Active, Planning, and Completed projects.
- Click a project row to expand its phases.
- Use Edit to correct the customer, name, description, dates, budget, or notes.
- Use Start, Hold, or Resume from the project row to move work between Planning, Active, and On hold.
- Use Delete only when the project and its phases should be removed.
Work with phases
- Expand the project row.
- Click Add Phase.
- Enter the phase name and any helpful description or notes.
- Repeat for the sequence of work your team follows.
- Click Complete as each phase finishes.
ToolbagCRM keeps phases in order and shows how many are done. Removing a phase compacts the remaining sequence so the checklist stays gap-free.
Tips
- Keep phase names short and field-friendly, such as Demo, Rough-in, Inspection, and Punch list.
- Use the project budget for the overall target; keep job-level invoices and service details on the individual job records.
- Update the target end date whenever the customer-facing commitment changes.
- Review Planning projects weekly so approved work does not sit without an owner.
Troubleshooting
The New Project button is disabled or the project will not save
Projects require both a customer and a project name. Create or select the customer first, then try again.
A project moved to Completed after I finished phases
That is expected. When all sibling phases are Completed or Skipped, ToolbagCRM automatically marks the parent project as Completed so managers do not have to close it manually.
I need a recurring agreement, not a one-time initiative
Use Maintenance Contracts for recurring service agreements. Use Projects for a bounded initiative with phases and an end date.