Customer Equipment
Customer Equipment keeps a service history for the units your team maintains at each customer site, such as HVAC systems, water heaters, generators, pumps, appliances, or irrigation controllers.
When to use this
Use this plugin when technicians need to know exactly what is installed before they arrive on site. It is especially useful for teams that repeatedly service the same equipment and need quick access to make, model, serial number, install year, warranty status, filter size, refrigerant type, property address, and technician notes.
Before you start
- Confirm Customer Equipment is included in your ToolbagCRM plan.
- Enable Customer Equipment from Settings → Features or the Marketplace.
- Make sure your customer records are ready so equipment can be tied back to the right account or property.
- Decide which fields your team will treat as required on every unit, such as serial number, warranty expiry, or filter size.
Add a customer-owned unit
- Open Customer Equipment from the ToolbagCRM navigation.
- Select Add Equipment.
- Enter the equipment name and category.
- Add the make, model, serial number, install year, and warranty expiry when known.
- For HVAC equipment, add filter size and refrigerant type so technicians can prepare before the visit.
- Enter the customer name and property address.
- Add any internal notes your technicians should see before servicing the unit.
Equipment categories
When adding a unit, choose the category that best matches the equipment. ToolbagCRM uses these categories to organize the list and support filtering:
- Furnace, Air Conditioner, Heat Pump, Boiler — heating and cooling equipment
- Water Heater, Water Softener, Pump — plumbing and water-treatment equipment
- Electrical Panel, Generator — electrical equipment
- Irrigation Controller — irrigation and sprinkler systems
- Appliance — general household or commercial appliances
- Other — equipment that does not fit the categories above
If you choose the wrong category, edit the unit to correct it. Category labels appear in the equipment list so technicians and office staff can scan by type.
Track service notes
After a unit exists, add notes to record service observations, technician follow-up, or job-specific history. Each note can include:
- Body — the service observation, parts replaced, maintenance reminder, or other detail.
- Job link — tie the note to a specific job so future technicians can see which visit produced the observation.
- Technician name — attribute the note to the technician who performed the work.
- Note date — when the service happened; defaults to the current date if not set.
Use notes for details that should follow the unit over time, such as recurring issues, parts replaced, refrigerant charges, or maintenance reminders. Notes that link back to a job give the next technician full context without searching through unrelated records.
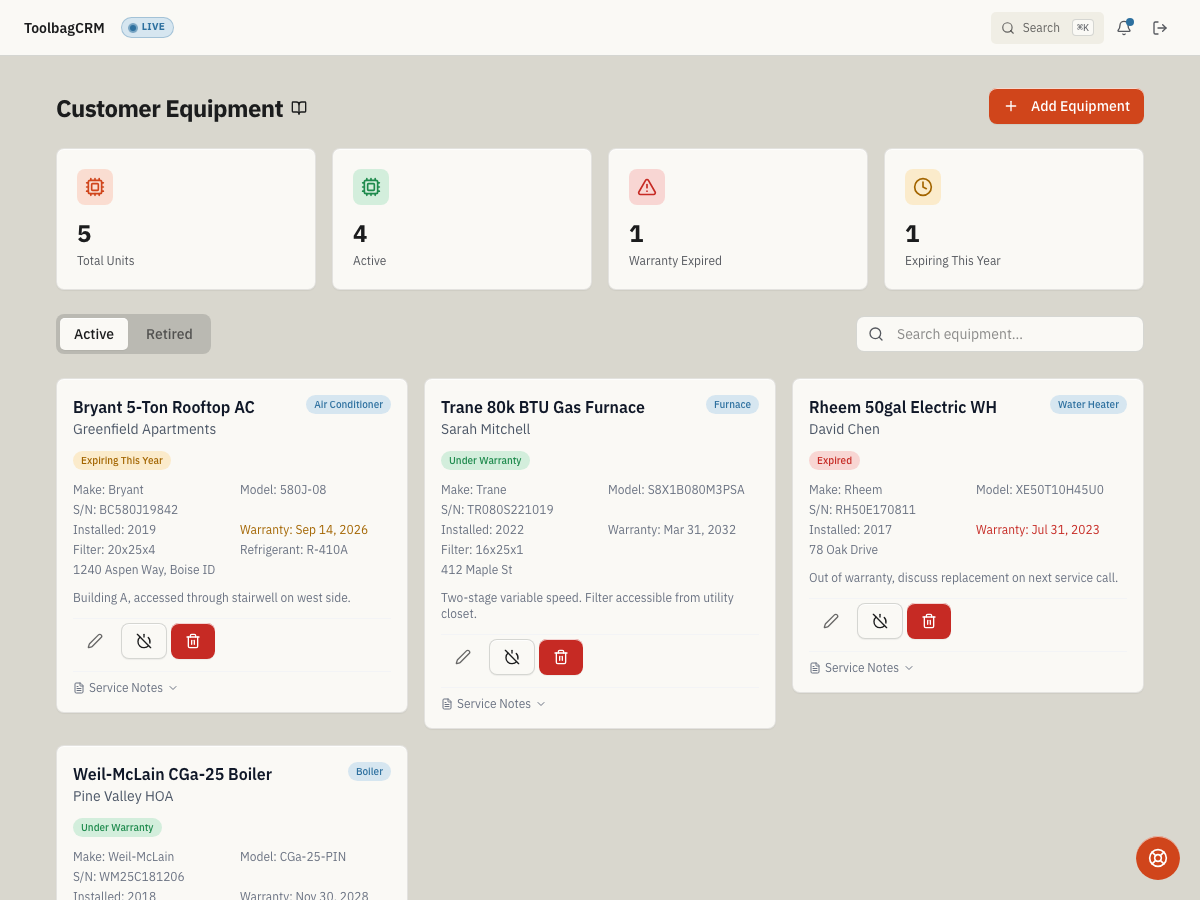
Dashboard counts
The Customer Equipment page shows summary cards with quick totals:
- Total units — all equipment records for the account.
- Active units — equipment that has not been retired.
- Warranty expiring this year — units whose warranty expiry date falls within the current calendar year and has not already passed.
- Warranty expired — units whose warranty expiry date is in the past.
- Notes this month — equipment notes added during the current month, useful for tracking technician documentation activity.
Use the warranty counts to prioritize outreach to customers with aging equipment before service calls reveal expired coverage.
Retire or reactivate equipment
Use Retire unit when a customer replaces or removes a unit but you still want the old history available. Retired equipment moves out of the active list and can be reactivated later if needed. Use permanent deletion only when the record was created by mistake and no history needs to be preserved.
Tips
- Standardize naming, such as
Brand + size + unit type, so search results stay useful. - Record warranty expiry dates to surface equipment that may need special handling before repairs. Use the Warranty expiring this year count to plan proactive outreach.
- Add filter size and refrigerant type for HVAC units to reduce return trips.
- Retire replaced units instead of deleting them when the service history may still matter.
- When adding a note, link it to the job and enter the technician name so the observation is traceable to a specific visit.
- Use the Notes this month count to check whether technicians are documenting service observations consistently.
Troubleshooting
The equipment list is empty
If the list is empty after enabling the plugin, add the first unit from the Add Equipment action. If saved units are missing, confirm you are viewing the right account and that customer-equipment access is enabled for your role.
Warranty counts look wrong
The Warranty expired and Warranty expiring this year counts are based on the warranty expiry date stored on each unit. If a unit has no warranty expiry date, it is not included in either count. Edit the unit to add or correct the warranty date.
Notes do not appear on a job
Equipment notes are separate from job notes. An equipment note linked to a job appears on the equipment record; to see it on the job itself, check whether the job's activity timeline or related records surface equipment notes for your account.