Customers
Customers are the people and companies you serve. The Customers page is your central directory for contact details, service history, tags, and every job or invoice tied to that account.
Open Customers from the main navigation.
When to use Customers
Use Customers when you need one reliable place to answer:
- Who are we working for?
- How do we contact them?
- What properties, jobs, invoices, and notes are connected to them?
- Are there tags or warnings the office or field team should know before scheduling work?
Before you start
- Customers is always available — no plugin or feature toggle is needed.
- Customer records are the foundation for Jobs, Quotes, Invoices, Memberships, and most other ToolbagCRM workflows. Create the customer first, then attach other records to their account.
- Gather the service address in parts when you have it: street address, suite/unit, city, state or region, and ZIP/postal code. ToolbagCRM combines those fields into the address shown on customer rows and uses the postal code for weather-aware workflows.
- Search the customer list by name, phone, email, or address before creating a new record to avoid duplicates.
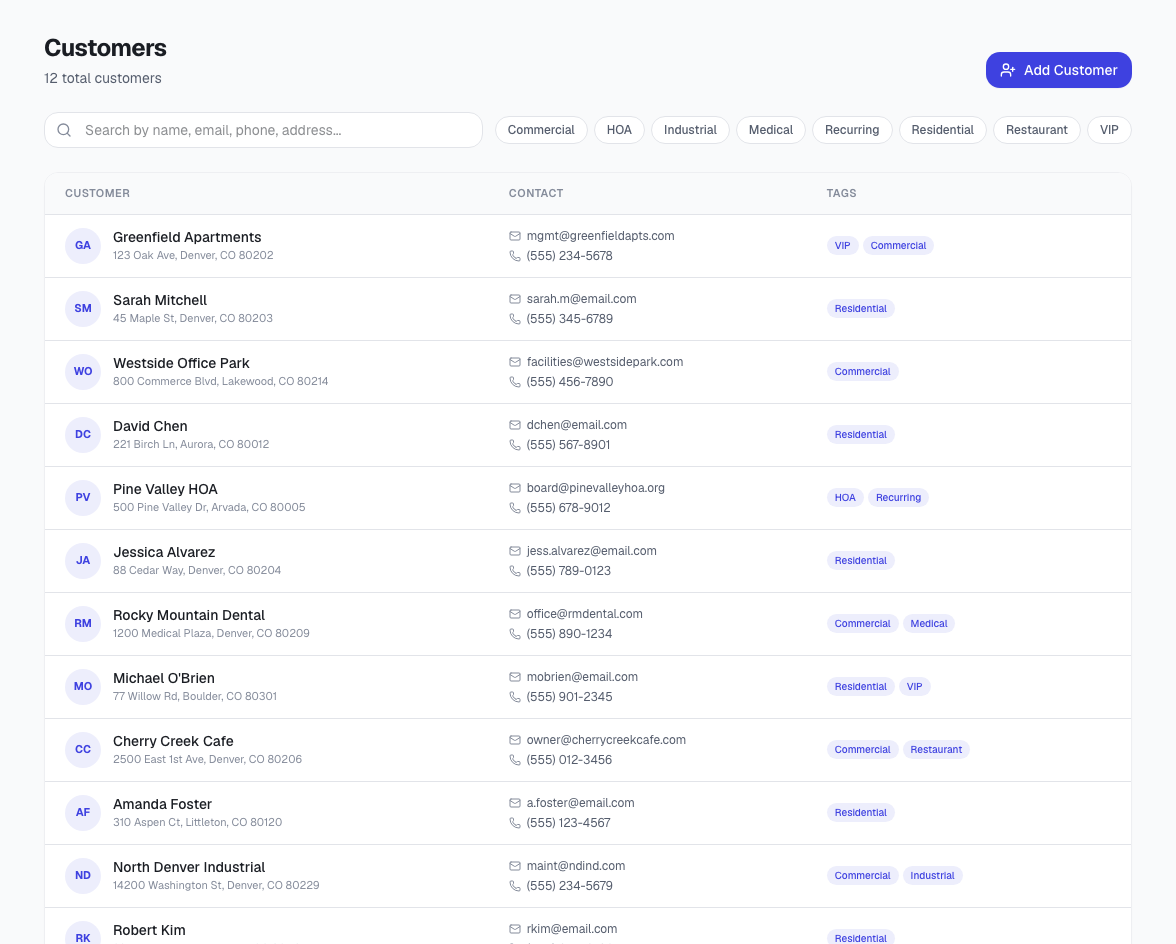
The customer list
The customer list shows every customer record in your account. Each row displays:
- Customer name with an avatar using their initials.
- Formatted service address beneath the name, combined from street, suite/unit, city, state or region, and ZIP/postal code when those fields are available.
- Email — clickable to send a message.
- Phone — clickable to call.
- Tags — color-coded badges such as residential, commercial, maintenance, or priority account.
Search and filter
- Use the search bar to find customers by name, email, phone, or address.
- Click a tag pill to filter the list to customers with that tag. Click again to remove the filter.
Add a customer
- Click Add Customer.
- Enter the customer Name (required).
- Add Email and Phone as available.
- Fill out the address fields you know: Address line 1, Address line 2, City, State/region, and ZIP/postal code. ToolbagCRM formats the completed parts into one address for the list and customer profile.
- Add any Notes about the customer.
- Save the customer.
Customer detail view
Click any customer row to open their full profile. The detail view includes:
Contact header
- Large avatar with the customer's initials.
- Customer name and "Customer since" date.
- Tags displayed as brand-colored badges.
- Edit button to update or delete the customer.
- Contact row with clickable email, phone, and address.
Stats row
Four stat cards give you a quick read on the customer's account:
| Stat | What it shows |
|---|---|
| Jobs | Total job count with how many are completed |
| Invoices | Invoice count with lifetime invoiced total |
| Lifetime Spent | Dollar amount of all payments applied |
| Open Balance | Remaining unpaid balance (highlighted in red when outstanding) |
Jobs card
Lists every job for this customer. Each entry shows the job title, scheduled date and time, and status badge. Click a job to open it.
Invoices card
Lists every invoice for this customer. Each entry shows the invoice number, total amount, due date, and status badge. Click an invoice to open it.
Activity timeline
A chronological feed of all activity on this customer record — status changes, notes, payments, and other events.
How customers connect to ToolbagCRM
Customers are the anchor for most ToolbagCRM workflows. Jobs, quotes, invoices, memberships, communications, customer equipment, service areas, and customer-facing features all connect back to the customer record so the team sees the full relationship instead of hunting across separate tools.
Tips
- Keep the primary phone and email current so dispatch, invoicing, and automated messages reach the right person.
- Keep the ZIP/postal code field current when the service address changes; weather-aware cards and forecasts use that postal code before falling back to a legacy free-form address.
- Use tags consistently so searches, filters, and automations stay useful as your customer list grows.
- Put service-location notes on the customer or property record instead of burying them in one job.
- Before creating a new customer, search by phone, email, company name, and street address to avoid duplicates.
- Use the Notes field for gate codes, pet warnings, billing preferences, or anything the crew should know before arriving.
- Review the Open Balance stat card before scheduling new work for a customer with outstanding invoices.
Troubleshooting
The customer list is empty
If you just enabled the account, click Add Customer to create the first record. If customers existed before but the list is blank, check the search bar and tag filters — a cleared filter may reveal hidden results.
A customer was created by mistake
Open the customer detail view and select Edit to delete the record. If jobs or invoices are already linked to the customer, consider keeping the record and merging the correct information instead of deleting, so the job and invoice history stays intact.
Search is not finding a customer
The search bar matches name, email, phone, and address. Try searching by phone number or email if the name spelling is uncertain. If a tag filter is active, clear it — the customer may not have that tag.
Duplicate customers appear
If two records exist for the same person or company, open each one and verify which has the most complete job and invoice history. Update the preferred record with any missing contact details, then delete the duplicate. Going forward, search before adding new customers.